|
Anodizing Aluminum
by Bryan Pryor
|
|
| This website comes from the the rambling mind of Bryan, and some of his knowledge on the subject of small-scale anodizing. This is an update of my older anodizing page that can be found here. The main goal is to provide information on how to set up a small scale anodizing line that provides professional results. My method may not be the cheapest, but it will truly give you spectacular results. Read carefully through this entire page before you begin anything, as this is not a step-by-step process but an overview. |
|
 Example of a DIY Fade Anodize |
|
|
It all started back in the college days, when a friend decided he needed to anodize a paintball gun. I had found a magazine article claiming that with some battery acid, RIT clothing dye, and a battery charger it was possible to achieve a good quality anodized finish at home for a fraction of the cost. As you may guess where this is going, it didn’t work so well.
However, after a couple of years of reasearch, trial and error, and way too many hours of polishing aluminum, I finally found a method of anodizing that works well for the small scale anodizer.
My basic method could be described as a modified version of the low current density method proposed (and sold) by Caswell Plating. In the low current density method, Caswell recommends using a constant current source and a low concentration sulfuric acid bath. I tried this method, and it worked, but I was still not 100% happy with the results. By using a constant current density of around 12 amps per square foot (ASF or amps/ft^2), and a higher concentration sulfuric acid bath, I could achieve the same or better results in about half the time.
I must give credit to Ron Newman, who has had an anodizing site up for quite some time. It was his original site that prompted me to even attempt anodizing at home. Although I can’t say I agree 100% with his method of using a battery charger as the power supply (and yes, I have tried it), I do agree with most of his other information. I have bought some dye from Ron and I was very pleased with the service I received from him. I would recommend doing business with him.
Let’s get started with the basics: What will you need to set up your own cheap, inexpensive do it yourself (DIY) home anodizing line? This will be for type II anodizing (type 2 anodizing). That is the type of anodizing that takes dye well and is typically used mainly for cosmetic purposes, but also adds a hard aluminum oxide coating to the part that is very corrosion resistant as well as wear resistant and has electrical insulating properties. I’m getting ahead of myself, though. Back to the concept at hand: What do you need to set up your own anodizing kit?
Items needed:
 Basic DIY Anodizing Kit
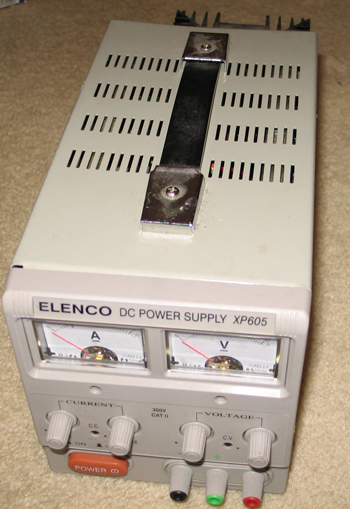 One of my Anodizing Power Supplies – 5 Amps
Here’s an example of a larger constant current power supply at Amazon:
Getting started:
Basic Steps:
1. Clean the aluminum parts.
2. Degrease the aluminum parts.
3. De-Smut the aluminum parts.
4. Anodize in the acid bath at 12 amps/square foot for 45 minutes. Keep temp at 70-72 degrees (F).
5. Remove parts from acid bath and rinse with distilled water.
6. Dye parts (if desired) in warm dye, ~100 – 140 degrees (F).
7. Seal parts by placing in boiling distilled water for 20-30 minutes.
It should be assumed that the parts are thoroughly rinsed in distilled water between each step.
A typical DIY setup for beginning anodizing is shown on the right. A 5-gallon bucket will work for small parts, the large plastic storage totes offer a variety of shapes and sizes available for larger parts. In my experience, these have worked well. These will be the tanks that will be storing your sulfuric acid anodizing bath, so take caution to ensure they will not leak. Sulfuric acid is a corrosive chemical.
Cleaning the Parts
This is likely the most critical, yet overlooked, step in anodizing. The parts must be surgically clean before anodizing to ensure good results. I prefer a multi-step process to ensure good results. First, put your rubber/nitrile gloves on and wash your hands thoroughly. This ensures the gloves are clean on the outside. Then, go through a 3-step process to clean and de-grease the parts. Step 1: Clean the parts with hot water and dishwashing detergent. Depending on the geometry, a brush might be helpful at this point. After the dishwashing detergent, the parts should be visually clean. Next, clean the parts with a degreaser such as Simple Green. Finally, use an anodizing specific degreaser, usually heated, to get the level of cleanliness needed. I have had good success with the SP cleaner available from Caswell. At this point, water should not bead up on the surface of the part, but form an even sheet over the entire part. If you see water beading up, that shows the presence of grease & oil, and the cleaning process should be repeated.
Now it is time for the Desmut. Dip the parts in the Desmut tank for 1-4 minutes. The Desmut solution can dull the finish on your parts, so if you are going for a mirror-finish, keep it under 2 minutes. What is the purpose of the Desmut step, you might ask? To remove impurities from the surface of the aluminum part. For instance, some alloys have high levels of copper, which do not anodize well without a Desmut step. For consitency, I desmut every time. Once you are quite familiar with the process, you may experiment with differing times in the desmut tank. As always, rinse well after Desmutting.
Anodizing
Finally – it’s time to anodize!!! By this point you should have prepared your acid bath by mixing 1 part battery acid to 1 part distilled water. Remember “Acid into water is the way you oughta.” That’s right, slowly pour the acid into the water, don’t pour the water into the acid. You can find sulfuric acid at any auto parts store by buying battery acid. With this concentration of battery acid, you will need to anodize at 12 amps/square foot using a constant current power supply. Constant current density anodizing is one of the easiest ways to ensure consistent results.
FAQ:
Where do I buy the sulfuric acid/battery acid? I have found it available at most good auto parts retailers.
How do I mix the acid? Acid into Water
What ratio should I mix the acid at? I prefer somwhere around 1:1 for 12 ASF.
What type of container should I put the acid into? I have had good success with 5 gallon buckets as well as Rubbermaid style plastic storage bins.
What current density should I use? You can choose either 6 ASF or 12 ASF. Mix the electrolyte to match your current density.
What is the 720 rule?
anodize, anodizing, home anodizing, diy anodizing, how to anodize, learning anodizing
Let’s first get some nomenclature out of the way. I say anodizing. Some call it anodising. Just depends on which side of the pond you come from. Some may call it aluminum anodizing, others may say aluminium anodising. I kind of like the sound when a european says aluminium, but I grew up saying aluminum. However, looking at the periodic table of elements, I believe the Europeans have it right when they say aluminium. So, for the sake of variety, I may say aluminium anodizing at some point. Since we’ll be using sulfuric acid, we should get that out of the way, too. Sulfuric acid is H2SO4, commonly called battery acid by non-chemists. It may also be called sulphuric acid. At some point we may be talking about titanium racking systems, too, but I don’t think there’s a large variety in the ways to spell titanium. Current Density & constant current anodizing are important. voltage controlled anodizing may work, as well as battery charger anodizing, but I’m not going to recemmend those.
|
|
Thanks for this page…exactly the info I was looking for. Do you happen to have any pointers to anodizing graphics using some sort of overlay or screen? I don’t know the correct terminology for it. Anodizing all one color is great but I’d love to anodize graphics like logos and stuff, too.
Masking
Hi John, I will try to put together some stuff regarding anodizing graphics. I have personally done ‘fade’ and ‘splash’ anodizes, but never detailed graphics. For detailed graphics, I would assume you would want either an inkjet style printing or a screen printing. Take a look at this site: http://anodizingindustries.com/Graphic%20Anodize.html
Hello, can you tell me where to find an Aluminum Anodizer Kit. Building one can’t do that best to buy. Thanks!
You can try Caswell plating. They sell good kits.
Hey thanks for the great tips! One question though, you call for a current density of 12A per square foot and your power supply looks to be rated for only 5A (given the model number), do you simply use a very small container? I’ve tried to find higher current precision power supplies and have only come across high current regulated models. Thanks!
Hi Shaun, I have both a 5 amp and a 20 amp power supply. Caswell Plating used to sell a decent priced 20 amp constant current/constant voltage power supply. You can also find these on eBay for a bit less. With a 20 amp PS, you can get close to 2 square feet at 12 ASF or just over 3 square feet if you use a low current density method like Caswell’s 6 ASF. You’re not going to anodize a car bumper or anything large like that, though. 🙂
You talk about rinsing after the Desmut step but not after anodizing. I assume you would rinse after all steps. Could you use a shared rinse tank?
Hi Nick, you are right. You should rinse after anodizing as well. I used a different tank to rinse after anodizing. This allows you to recapture the acid, let the rinse water evaporate off, and put it back into your anodizing tank. If you use a single rinse tank for all rinse steps, you will have to dispose of more waste.
Hello,
I have just bought a small sailboat that has some anodized parts which are rather faided – originally black but now nearly white/metal in some parts. Could you tell me if such parts can be anodized again and if so how should I prepare the parts for the process?
Since it is to be used in a marine environment, should it be type 2 or type 3 anodized?
Thanks an advance,
Kenneth
Hi Kenneth,
You can strip the old anodized layer off using Sodium Hydroxide. The parts can be re-anodized. In the future, make sure the dye you are using is UV resistant to prevent fading. If you are interested in the maximum corrosion protection and color-fast nature, you could also powder-coat over the anodized finish. This will give you a whole other layer of protection, but will change the look from an anodized aluminum surface to a painted surface.
You cannot powdercoat over anodize….it no longer conducts. It must conduct electricity to powdercoat….
Powder Coat uses electrostatics. All you should need to do is to leave a spot (or tap a screw hole) to connect to the static supply. As to how well the finish will fuse after baking is a different matter.
My understanding of the process tells me powder coat should work, as long as there’s a conductive location to connect the wire. However, local powder coat shops claim otherwise. When I asked how they could powder coat over another layer of insulating powder (such as clear coat over color), their answer didn’t make much sense. So, I’m still not sure what’s going on.
Good,concise info on aluminium anodizing. Easy to comprehend and to rhe point. ..thanks.. SAL SANGILLO, MSME (retired).
Pingback: Deburring aluminum?
can I use 5Amp to do pocket knives?
Hi Brad, 5 amps should work for most small pieces. Even if you’re anodizing at 12 Amps/Square foot, you should still be able to anodize 60 square inches at a time. At 6 ASF you could do double that.
Hey Brad Great Site man,
Im going to be attempting or want to anodize my ar15 lower I machined since there is noone available for months to send it off to have it done I figured hey I’d love to try it myself.
Anyways, I want to keep things simple and to the point. Im not going to be anodizing anything else just the lower receiver and I’m positive a 5 gallon bucket would suffice.
What setup would you recommend? I was looking at your Power Supply in the pic you provided and found it on Amazon, so how many buckets would i use and is there a way you could give a step by step in more detail with that basic setup on how you’d anodize a lower receiver just using 5 gallon buckets?
Thanks
Brandon
Hi Brandon, a 5 gallon bucket setup would work just fine for an AR receiver. You could probably get by with about 2 gallons of electrolyte. Take a look at Caswell Plating’s website for some more details on how to set up a basic kit:
http://www.caswellplating.com/electroplating-anodizing/anodizing-products/standard-anodizing-kit.html
Sorry Bryan*** lol, autocorrect!!
Hi Bryan !
Thanks for sharing. I have 2 questions:
1) you say “mixing 1 part battery acid to 1 part distilled water” and then in FAQ you say “I prefer somewhere around 1:2 for 12 ASF”. So what’s the truth ?
2) I would like to anodize AL panels. If you are talking about anodizing 1 sq.foot, does it mean workpiece 1 x 1 foot big or half of it ? (both sides summed together) ? I hope you understand me 🙂
Hi Enriqe, thanks for the question. 1:1 is what I have used for best results with 12 Amps/ft^2 (ASF). I’ll correct my notes above.
For the second question, you need to count the surface area of both sides. Actually, you need to count all 6 sides, but the 4 edges will have a pretty small surface area if they’re just thin pieces of sheet metal, such as 0.032″ thick.
Hi Bryan,
I’ve been experimenting with powder coating anodised aluminium parts in an oven at 200 C for 10 minutes. Is it possible that the anodising would craze slightly at that temp?
cheers,
Tim.
Sorry Tim, but I really don’t have any experience powder coating. Wish I could help more.
Very good and helpful article, I have one question though, will two small aluminium parts epoxied together can be anodized or will the acid bath dissolve the glue?
GOOD DAY BRYAN,
WHAT ABOUT HARD ANODIZING? WHAT DO I ADD?
Hey Bryan
I just read your page and I didn’t see anything on how to hook up the power supply.
Bryan, this was a GREAT write-up! Thanks for taking the time to do it. I have a question on power supplies. Obviously, Caswell has their rectifiers and you use the Elenco PS. I know that constant CURRENT supplies are the way to go. However, the term “constant current” doesn’t seem to give too many results on sites like eBay. Is there a way to know if a PS is “constant current”? Your Amazon link is no longer good, and I’m really just wanting to see a few more PS options. Something larger than the Caswell 5 amp, but smaller than their 25-amp. I’m just afraid to pull the trigger on one that might not work, so I thought I’d check with you. Thanks again for the informative site!
Hi Brian,
Is there any handbook for setting up an industrial hard anodizing line? Also, any anodizing magazine I can read?
Best regards,
Alex
Hi Bryan,
I have noticed a lot of controversy over the two used names, for
Aluminium (Aluminum) the fact is – BOTH are correct. The story
revolves around the two inventors – Hall (American) and Haroult
(French) of the Cryolite method of removing oxygen from Al2O3
(Bauxite) – the ore material.
Both men showed up, in their respective countries patent offices
at the same time ! Both men were credited with the same method, and share equality of patent design – how amazing !
Both spelling’s are Correct – Aluminum & Aluminium
I have tried twice to anodise a small piston, surface area about 3 sq cm. Using 15% sulphuric acid current around 70mA. The piston appears to be getting smaller, it’s about 3 thou smaller in diameter after 2 trys of 30mins each.
Cheers
Mike
Bryan,
Great info and thanks for making this available. I didn’t see any reference to Anodizing times? Assuming you are running your setup at 12 amps,, how much time would you need to properly coat a part? Also do you know what thickness the finish would be?
Thanks,
Robert
Here´s a video that we made for school about the process, you can also see the finished result against the original. https://www.youtube.com/watch?v=SAKLCvEXRyc&feature=youtu.be
I was wondering how you would seal an 18 inch Aluminum bar. Should I find I big long pot from good will to boil it in on a stove top or is there a way to steam it that might be easier? what have you done when trying to seal a part like this?
Thanks for the great site!
For something large and awkward, you could use some of the submersible ceramic heaters from Caswell and use something like a big cooler to bring the water to a boil. Luckily water is cheap, so you can use almost any container that will fit.
i build rc boats, would this stand up on the rudders and props,turn fins and trim tabs. they sale parts already done. but i,am a dyi kinda guy
Should hold up just fine. Anodizing is a really hard, tough surface.
I need to anodise small titanium components so they are gold in colour. Any help appreciated , many thanks
Sorry, I don’t have any experience anodizing titanium, just aluminum.
I was curious as to what you use to seal larger items. I’ve just began working with anodization and I have ran into the issue that my pot is too small to boil water and seal the color of some piping for my car. I’ve thought about using a Heating element but I don’t know if it will get hot enough with that much water. How do you seal your parts that are larger than a common pot or pan?
Also once I have already dyed the the item is it safe to re-use the dye for a later project?
I’ve never done anything really large, but Caswell does sell submersible electric heaters that you could probably use to do the trick. I re-used my dye for years and it still kept working.
What special problems would you face annodizing a 14ft long 4 inch diameter alluminum pile (tail boom of an ultralight aircraft – my largest piece)? I will also be annodizing the struts that hold up the wings (12ft / 1 inch ) and smaller cockpit area alluminum. I don’t have to annodicze any parts inside the wings which will be covered by fabric, only those visible.
Besides building a long thin bath, how would you go about it beyond the instructions for smaller parts? I.e. special concerns…
http://shellprompt.com/deathtrap1/VJ-24W/s-l1600%20(3).jpg
http://shellprompt.com/deathtrap1/mockup%20orange%202.jpg
http://dcim5.peachcountry.com/DSC_9949.JPG
http://shellprompt.com/deathtrap1/mockup%20orange%203.jpg
http://dcim5.peachcountry.com/DSC_9948.JPG
It shouldn’t take that much special other than a large tank and a cathode the length of the tank to ensure even coverage.
Bryan thanks for the great write up! Could you elaborate on not preferring the battery charger as a power supply? Its more convenient to use a device I already have for multiple purposes than to buy a power supply and use it once a year. And is the 12 ASF rule per square foot of the anodized item, or the square footage of the bath container?
I just preferred the consistency I got with the constant current power source. YMMV. If you already have a battery charger I would give it a try and see how you like it. If you’re not happy, spend the money on the new power supply afterwards. The 12 ASF is the surface area of the part you are anodizing.
Hi Bryan, I am looking to get into anodizing (mainly paintball guns) I was wondering if you could direct me to a decent power supply? Have been looking at mastech but don’t know which model would work best for that application. Any help would be greatly appreciated
Thanks
Matt
Hello Mr. Bryanpryor, is it important that the composition of the anodized aluminum and hanger of it ? I mean for example the anode aluminum which will be anodized is 1050 alloy and the hanger of it is 6063 alloy.. it can be possible or is it a problem for the process? Thanks in advance..
I don’t think the alloy matters for this. Let us know your results!
After zinc plating i anodised my parts but it rubs of easily any idea what to do
I don’t know. I have never tried to anodize after zinc plating. I have a feeling that the oxide layer on zinc would be much different than the oxide layer on aluminum. Have you ever looked at finishing.com? There are a lot of industry experts there that might be able to help.
Your problem is the zinc plating. If you remove the Zn plate it will work properly.
P.S. Why are you zinc plating aluminium?
How do you keep the temp at the recommended range?
I usually work in a conditioned space and keep a large volume of fluid, so the temperature stays fixed. If you cannot do this, you will need to add a heater or cooler. Caswell has some that work.
Hello Bryan, wonderful tutorial but can you give or confirm exact quantities. I have a small lab focused on dyestuffs and have good practical chemistry knowledge and good access to tech grade chemicals. First desmutting. As far as I can glean from the squillions of posts on anodising, a solution of 100g/l of caustic soda is used. Immerse the part for about 2 minutes. Next the acid bath. I have the tech grade which is specified as 98%. 10% seems to be the recommended strength. Current. Given that 1square foot =929square cms, 6amps per square foot would equal about 6.5mA/square cm. I have seen reference to anything from 6mA/square cm right up to 25mA/square cm. In this bath for up to 1 to 2 hours. Can you comment on these quantities/times so far? Ok, the dye bath. How much dye should I use? I have access to specific anodising dyes which are mostly pre-metallised acid dyes with an extreme light fastness, but no where can I see a suggestion on how strong the dye bath needs to be. Obviously cleanliness is critical and degreasing and nitrile gloves (some people are allergic to latex) a gimme. Some parts don’t lend themselves to polishing so tumbling in fine sand or even grit blasting to prepare the surface is a better option although this is a lengthy process and wont give a mirror finish.
Hi,
I am testing out the anodizing process so I can anodize a watch I am making. I would like to ask your advise please.
My setup:
I am using a 50/50 mix of battery acid and distilled water.
My test piece was a small piece of aluminium angle (surface area of about 3 inches)
I used an online calculator to get the current I need and the time to get 0.5 mils. It was 250mA for 30 minutes.
The part cleaned in soapy water, degreased and then cleaned again.
The part was put in the acid and run for 30 minutes.
I then boil the piece for 30 minutes. (No dye, as I just want a clear hard finish)
Although the piece has a nice hard anodized layer, the two edges that I smoothed with 1200 grit paper (using WD40 as a lubricant) have changed to a gun metal grey. The inner edges that I didn’t polish with the paper are the same colour as it started.
I thought I cleaned and degreesed the part well, but could this colour be due to residue from the 1200 grit paper I used.
Any help would be great.
Nice job. I manufacture accessories for target shooters and anodize in a variety of colors with RIT dye. My anodizing is now perfect and consistent. I machine 6061-T6 aluminum exclusively. It is extremely difficult to achieve a high gloss finish with this material. I experienced a chalky surface when I finish anodizing. It could be wiped it off but another step I didn’t need. So here is how I corrected the problem. The anodizing bath was the source. First battery acid is poorly regulated so you don’t really know how much acid is in your bath. Should be between PH 0 and .27. Secondly 6061 is not the best cathode. Any 11xx series aluminum is very close to 100% pure aluminum, a much better conductor and will last longer. The bath needs to be conditioned, put the cathodes in a couple of days before processing any anodizing, Remove and neutralize after finished. It is almost to impossible to acquire pure lead and unless it is pure it will contaminate your tank. Lead also holds heat better that 11xx series aluminum, and that’s not a good thing. I use heated @ 140 deg.GREASED LIGHTING to remove anodizing. I use the same stuff at room temp. to clean machined/polished parts prior to anodizing. To minimize the dull finish, restrict the time. Just do it over and over. Several comments about the use of RIT dyes. I found that if you mix at the same weight/liquid ratio as the expensive dyes it works well. I test all my products and RIT dyed parts have been exposed 24/7outside here in central Oklahoma for over a year. Very slight fading on only a few of the colors. Those expensive dyes always have high shipping cost attached and severely limit your options to experiment with different colors. I use RIT and it can be blended or double dipped to customize colors, Once you have been successful, keep detailed records for each process and color. I process 20 parts at a time in a 3 gallon tank with a 15 volt/20 amp rectifier power supply for 90 minutes. Hope this helps.
Hi Bryan,
Great write up, thank you.
I am looking to start doing some anodizing at home, i can get a Manson 1-16V 40Amp or 1-32V 20Amp power supply for the same price, I would obviously prefer the larger Amp version but I noted that you said it should be capable of at least 20V. Is there a particular reason why I shouldn’t get the 40A one? Does limiting it to 16V pose a large problem?
Thanks for your time.
Hmmm… tough question. I would think you could do OK with 16V. A lot of people anodize OK at 12-14V. Let us know which one you choose and how it works.
I am looking to hire someone to evaluate our anodizing process. Can someone give me some leads on who to contact to get this kind of service?
What is the 70/20 Rule? You asked the question but never gave the answer!
The 720 rule allows you to calculate how long you should anodize base on your current density, in Amps/Square foot. 720 = ASF x time. You can see the handy calculator at Caswell’s website, https://www.caswellplating.com/720.html#
Just wanted to say thanks and job well done on crafting a concise layman’s diy anodizing guide! I’ll be trying my hand at it on some old school BMX bike parts. As an aside, a very easy and effective method for removing old anodizing, (if need-be), is to simply coat the part with some “Easy Off” oven cleaner. I’ve just recently used it to remove the black anodizing from a set of cranks. Outdoors with rubber gloves and eye protection, of course, I used a Sterilite brand plastic shoe box container, which can be had for a buck at a local dollar-store. With the crank inside, I sprayed just enough oven cleaner to thoroughly coat it. After about 2 minutes, I began agitating the finish with a nylon scrub brush. Sure enough, the old anodizing came right of, turning the oven cleaner foam black. A quick wash and polish afterwards and the crank is clean and bare. I’ll be taking the further steps to get it meticulously clean, and away we’ll go. Fingers crossed…
Good tip! I’ll bet the oven cleaner contains Sodium Hydroxide. 🙂
Do you know of a company that design’s and builds and installs large aluminum finishing lines. From searches, it seems to be a hodge=podge rather than a turn-key design.fab house.
I’m sorry, but I don’t really know much about the large-scale anodizing lines. You might try finishing.com. There used to be a wealth of information there and more ‘industry’ talk than hobbyist.
Bryan yet another question,regarding bath fluid lm runnning just straight 34% acid with lead cathodes could this cause me any problems ? i clean the fluid and cathodes before useage(only done two test batches so far very small alloy washers)
cheers